How do I install the eHarness Battery Box 2.0 Upgrade Kit?Updated 3 days ago
The Battery Box 2.0 Upgrade Kit lets you upgrade your existing eHarness battery box with a new lid, battery spacer and receiver cable extension. Follow the steps below to install it.
Kit contents:
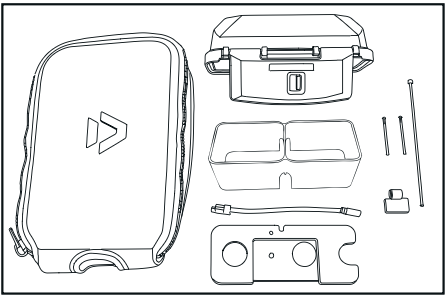
- Battery Box Lid 2.0
- Battery Spacer 2.0
- Receiver Cable Extension
- Receiver Cable Clip
- 7A Battery Cushion
- Hinge Pin Tool
- 2x Spare Hinge Pins
- Battery Box Neoprene Cover 2.0
Additional tools needed:
- TX30 Torx key
- TX10 Torx key
- Mallet
Steps to install the Battery Box 2.0 Upgrade Kit:
Step 1: Remove the battery box from the harness and remove the neoprene cover.
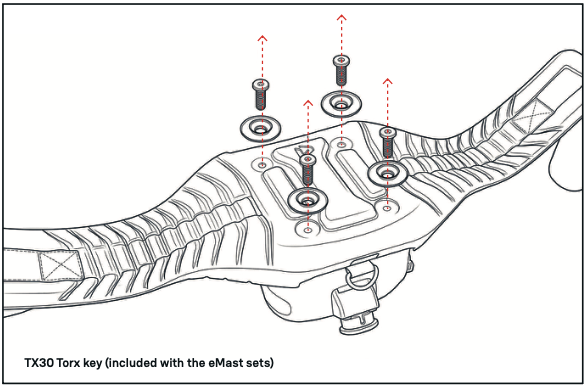
Step 2: Remove the receiver from the lid and bracket, then disconnect it from the battery box.
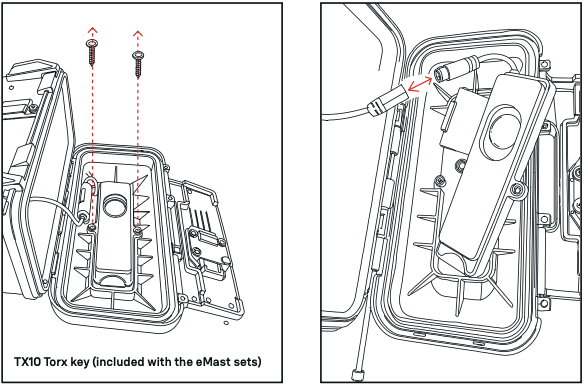
Step 3: Use a mallet to gently tap the hinge pin tool all the way through the hinges until both pins are removed. The top pin will push out the lower pin.
⚠ Note: Make sure the lid is slightly open for easier pin removal.
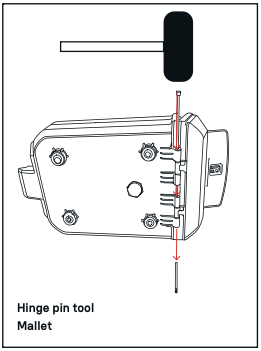
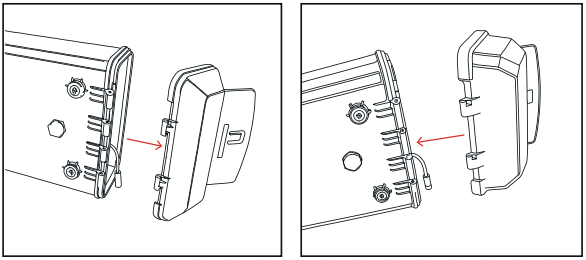
Step 4: Remove the old lid and replace it with the 2.0 lid.
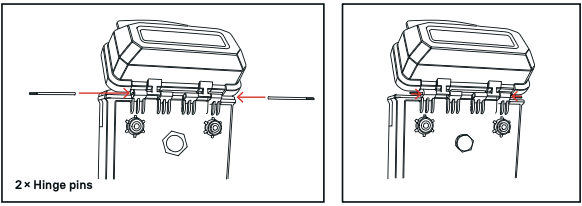
Step 5: Line up the hinges and insert the pins from both sides. Make sure the pin tips are facing outward.
⚠ Note: The pins can be inserted into the hinges by hand until the tips. Keep the lid slightly open for an easier insert.
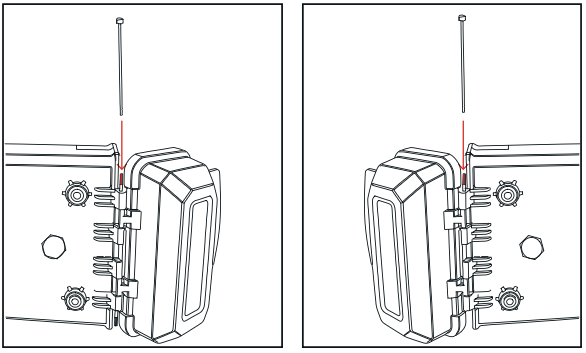
Step 6: With both pins in place on each side, use the hinge pin tool and a mallet to gently tap them back into place.
⚠ Note: Make sure not to over hammer. Stop when the pin tips are level with the hinges. Check to make sure the 2.0 lid opens and closes freely.
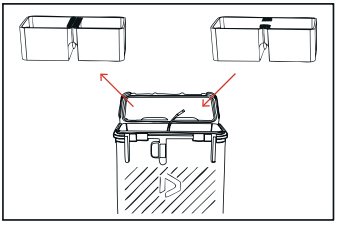
Step 7: Remove the existing battery spacer and replace it with the 2.0 Battery Spacer.
⚠ Note: You may need to exert some force to remove the existing spacer.
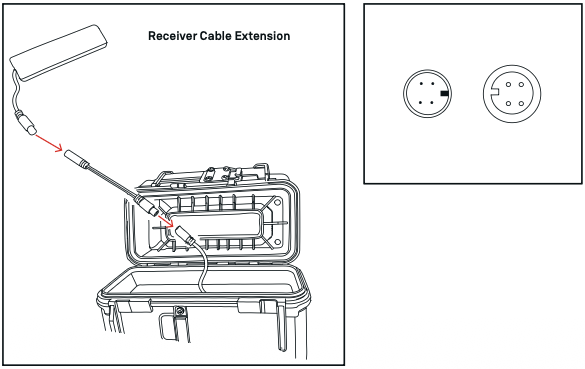
Step 8: Connect the Receiver Cable Extension to the battery box cable and the receiver.
⚠ Note: The connectors can only be inserted one way. Make sure the notch and recess are properly aligned.
Step 9: Install the receiver back onto the bracket and the 2.0 lid using the TX10 Torx key and the 2x M3x6 screws.
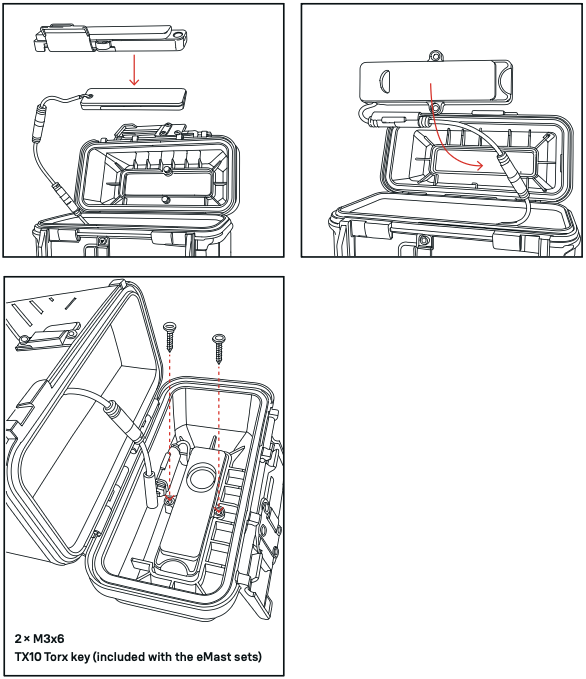
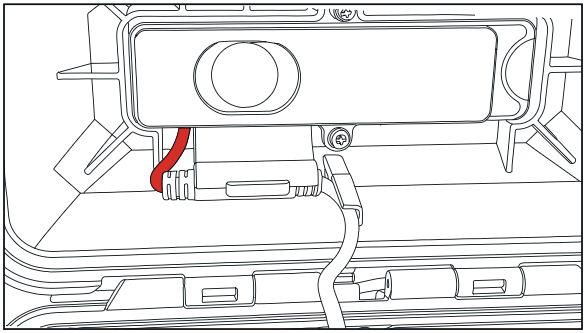
⚠ Note: Make sure the receiver cable is not being pinched by the bracket. There's a gap on the bracket to accommodate the cable.
Step 10: Install the Receiver Cable Clip onto the cable connectors.
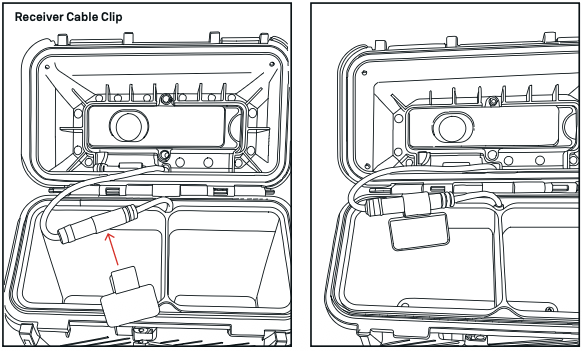
Step 11: Insert the clip between the two 10A batteries. This will prevent the connector from moving when closing the lid.
⚠ Note: Make sure the cables are not obstructing when closing the lid.
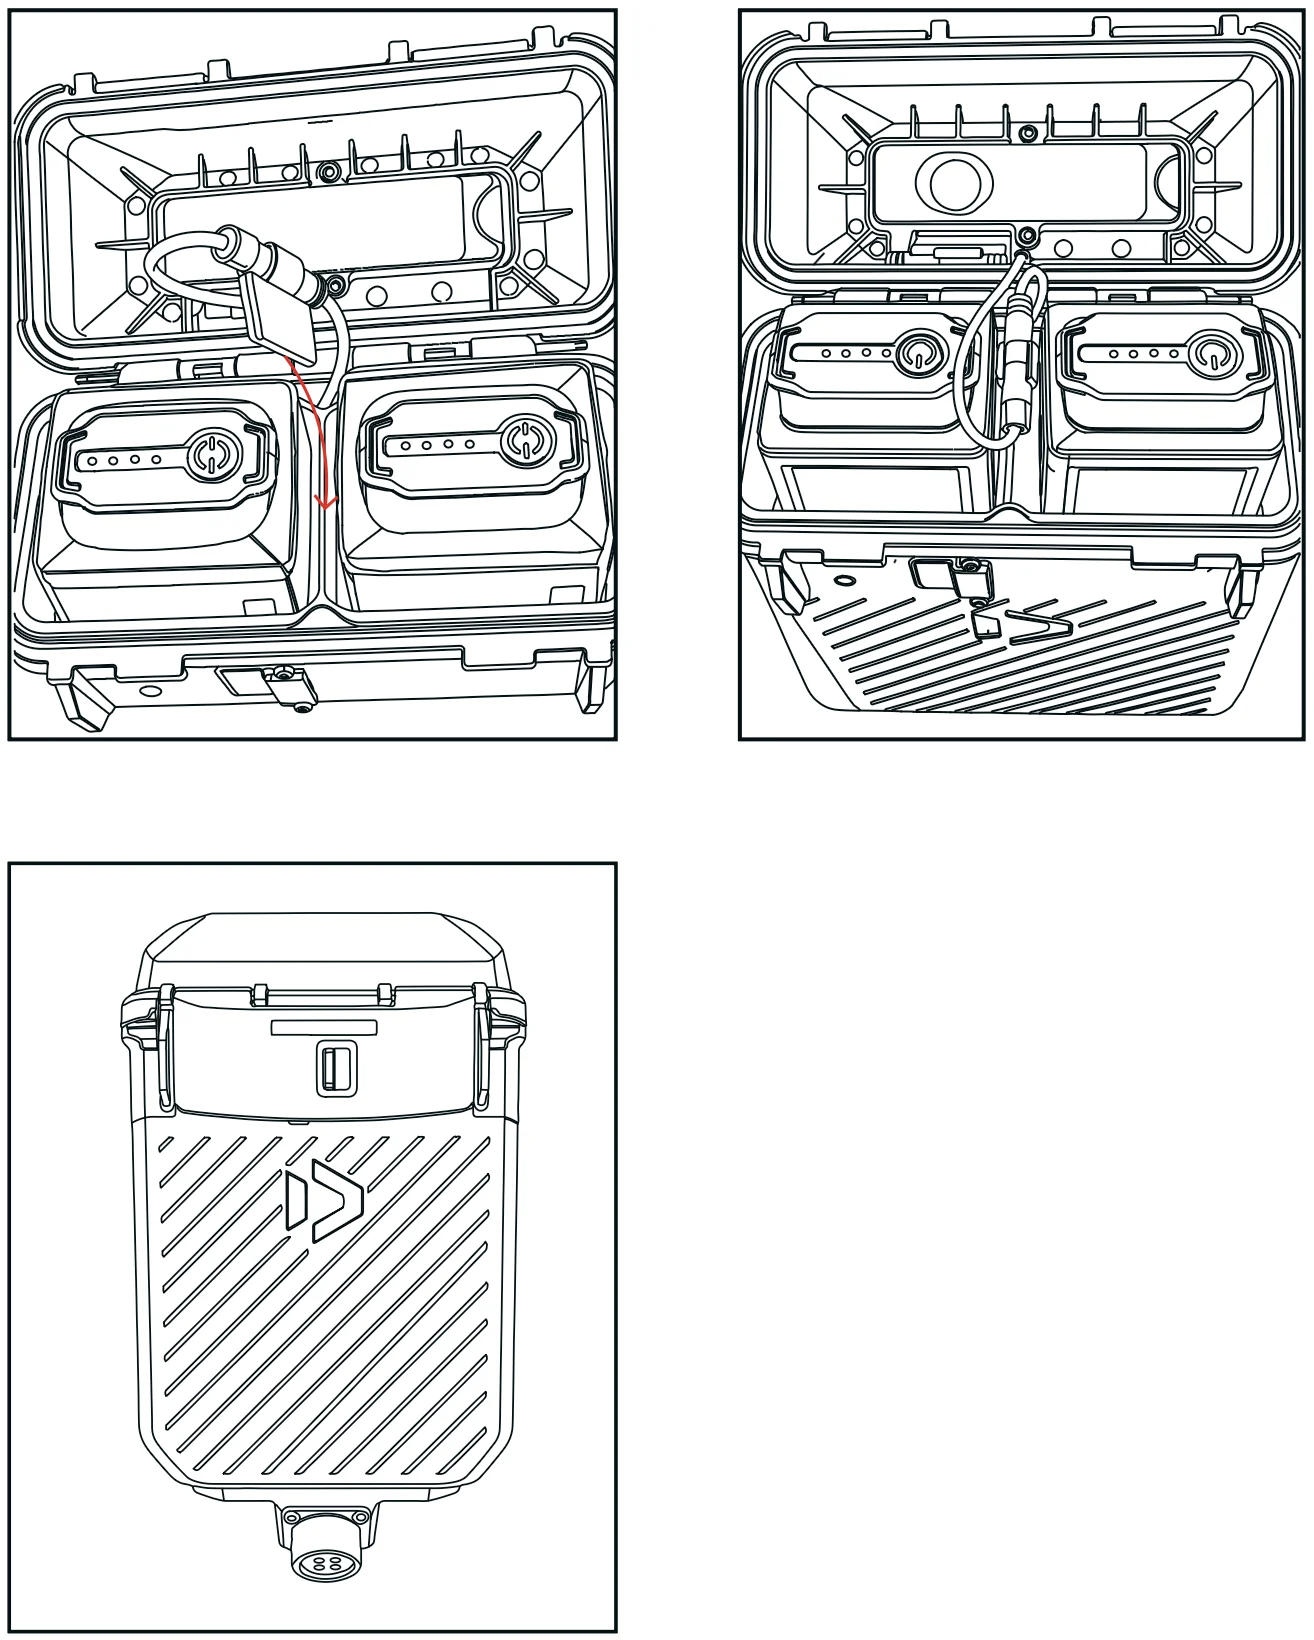
Step 12: Reverse the process to put on the Neoprene Cover 2.0 and reinstall the battery box onto the harness.
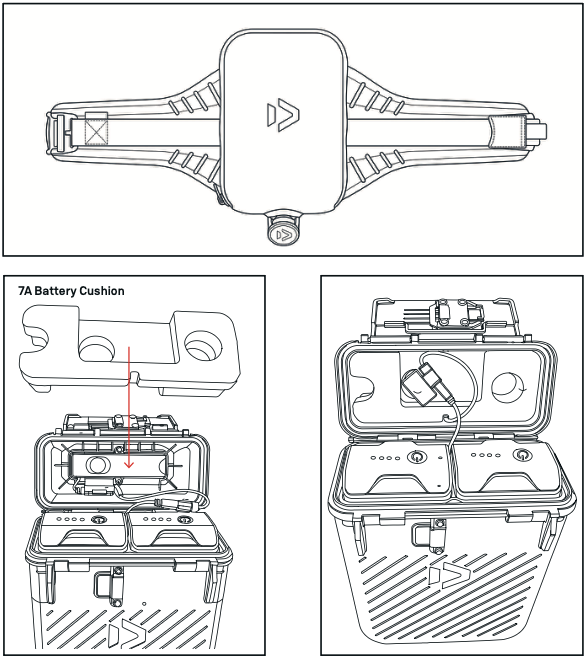
❗ Important: When using 7A batteries, make sure to insert the Battery Cushion into the 2.0 lid to prevent the batteries from disconnecting.